- If you are needing a little extra help setting up your own customized Pin It button for Pinterest, let’s take you through the easiest guide using the jQuery Pin It Button plugin (for WordPress) to customize your very own Pinterest button!
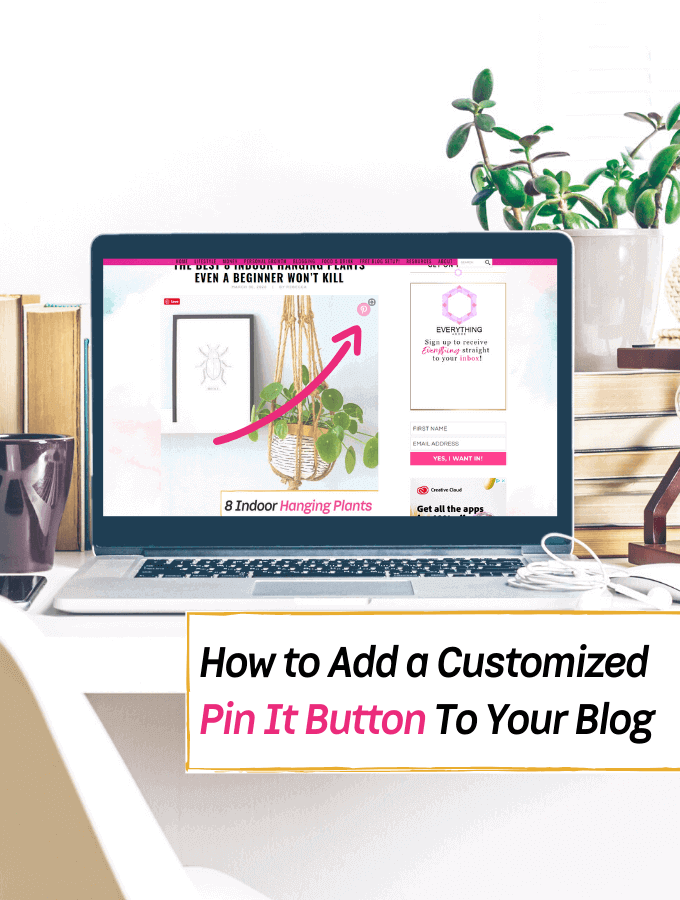


Have you ever wondered how to add a customized pin it button on your blog?
Well, today you are in for a treat!
Honestly, Pinterest is one of my top sources of traffic for my blog and it CAN be that way for YOU but only if you have a blog that you can market online right now.
However, if you don’t have a blog, I encourage you to take my step by step guide blogging guide here. Because if you do take twenty minutes to set up your very own online platform, you too, will be so much further than the rest who “think” about blogging but don’t take action.
Now, if you can harness a little extra element (that’s extremely easy to install) to get your readers to pin your pins to Pinterest themselves, then you bet it’s something to consider executing straight away.
Moreover, even though I have been known to preach about using Pinterest as the BEST traffic source for my blog * please take a gander at my Pinterest articles to see 😉 * — it’s all because Pinterest delivers!
So if you can utilize every little extra blogging tip possible to get your own readers to pin your very own pins from your blog posts, every little bit helps!
Not only that but the branding boost these customized Pinterest buttons deliver will give that little extra growth you need to make your blog look more credible and professional whilst you are still growing it.
Moreover, it’s really not that hard to create and install, I promise!
So let’s help guide you through the whole process of customizing your very own unique ‘PIN IT’ button (from thought to finish), by helping you install the wordpress plugin (for free) so you can have it on your blog in minutes!
NOTE: You will need a WordPress blog for this plugin to be set up. If you do not have a WordPress blog, I have a step-by-step guide HERE to help you set that up in minutes because it takes NO time at all!
How to add a customized PIN IT button to your blog!
1. Go to your plugins tab and click add new.

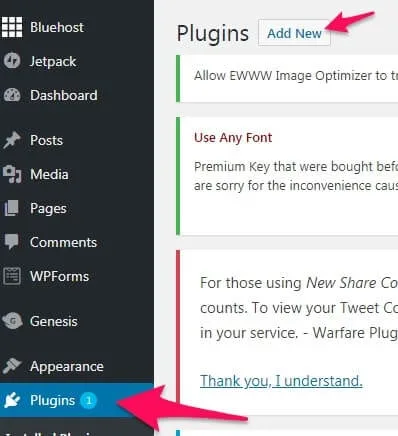
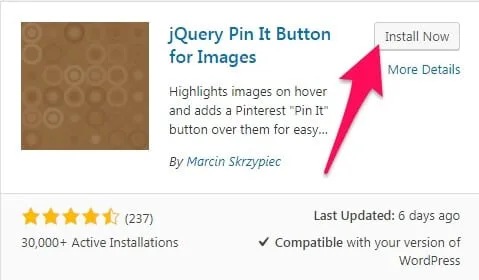
2. Search: jQuery Pin It Button for Images Lite plugin.


3. Install & Activate.

4. Get Familiar with the Settings panel.
You can find the plugin’s settings panel in the Settings submenu under the name jQuery Pin It Button for Images Lite. There you can find all the settings the plugin allows you to adjust. All settings are divided into several tabs so you can find what you’re looking for easily.
5. Now go and create your button.
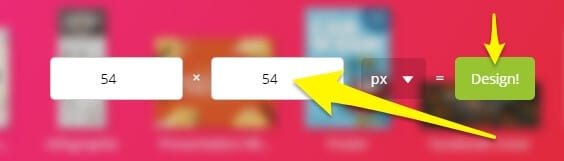
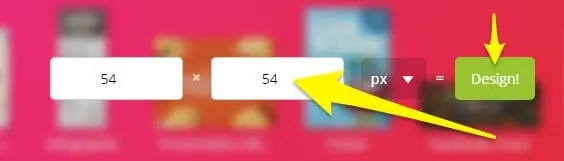
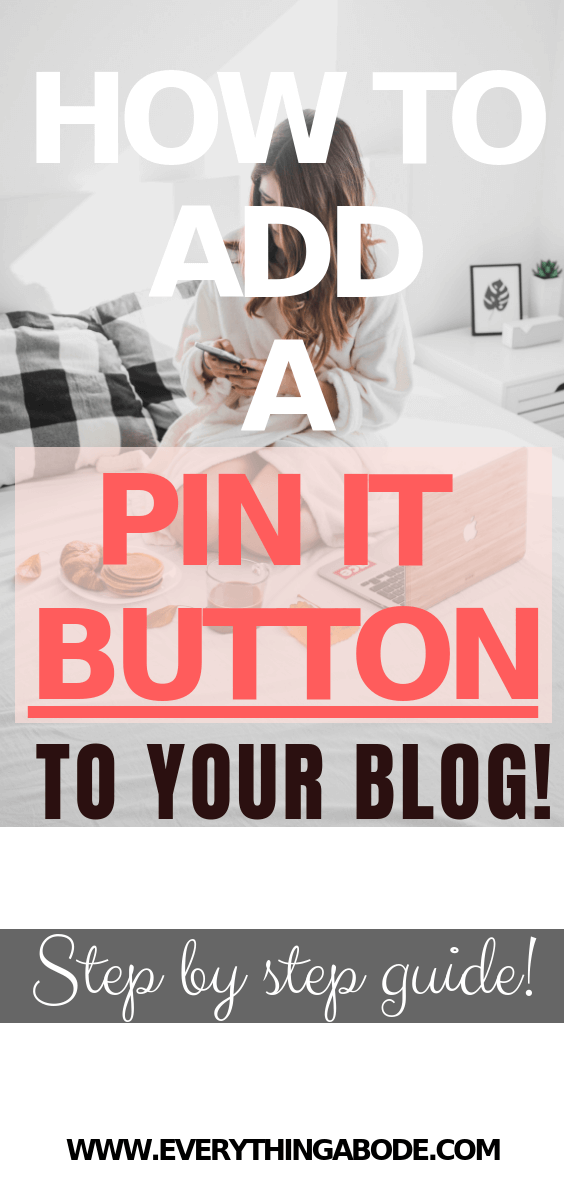
Using whatever graphic program you have (I use Canva) create your custom button. Make sure that you keep the dimensions for the button at 54px by 54px. The plugin does allow you the flexibility to change the height and width but keep in mind that it may adjust your image.
How to use Canva if you need it…
Customize your dimension in Canva to 54 px x 54px
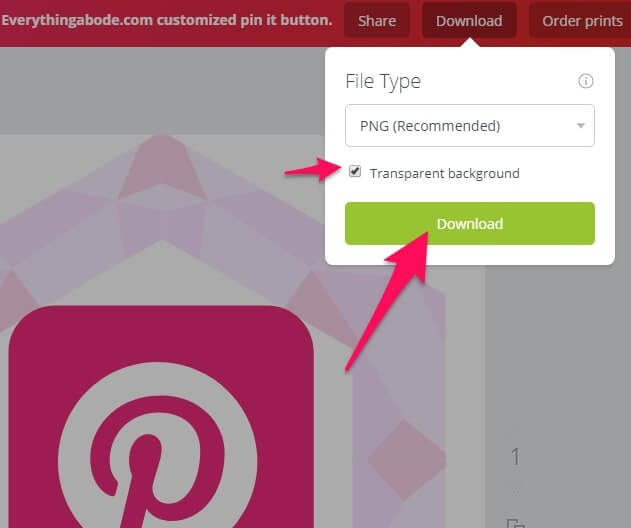
Make sure that you download your PNG file as a Transparent Background!
Now, Let’s Add Your Personalized & Customized Button!
6. Click the Visual tab.
>>>> Go back to the Settings tab in the jQuery Pin It Button for the Images Lite plugin.
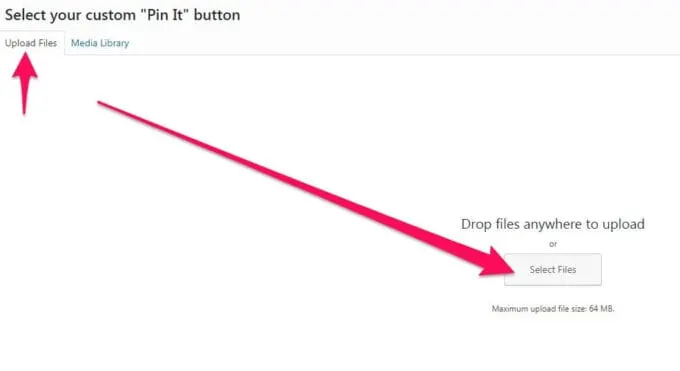
Scroll down to Pin Image & Click the Custom button and click upload image.
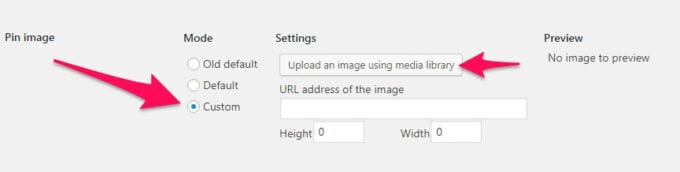
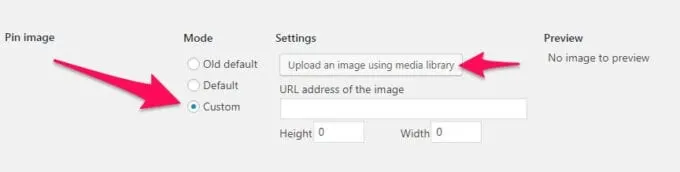
7. Upload the image you saved from “Upload Files“ then select your file.

8. Scroll to the bottom and hit SAVE and review.
Tip: You can fiddle with the height and width of your new custom image if you’d like (I didn’t) and a preview of your button will show on the right.
You did it! Enjoy your very own customized ‘pin it’ button!
Every little detail represents who you are as a blogger and how you are viewed as a blogger.
So if you want to stand out from the crowd?
This takes no time at all!
I hope you enjoyed this step-by-step tutorial and I’ll see you in the next post!
Pin + Share
Author: Everything Abode
Welcome to Everything Abode, your daily inspiration for every activity at home!
Our goal is to inspire you to live an elegant and chic lifestyle from the comfort of your home.
We’ll help you express yourself through authentic style, aesthetic beauty, and stylish home decor.
Subscribe to Get the Tools That Make My Blog Successful!

When you join my newsletter, I'm going to send you insider advice and tools that I use to grow my blog! I only save the BEST for my email list so don't wait!